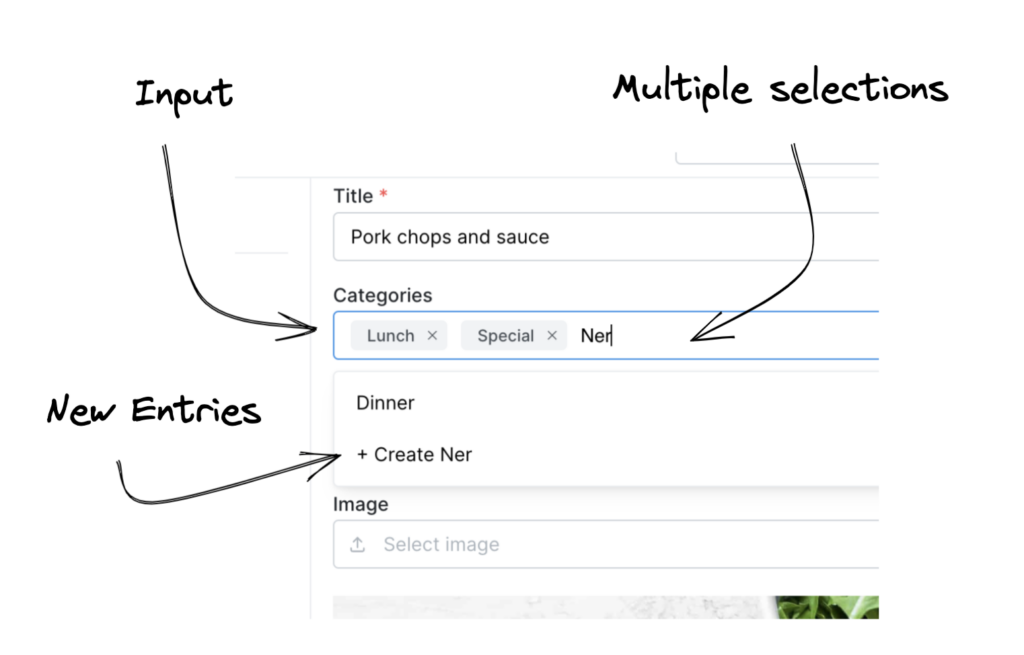
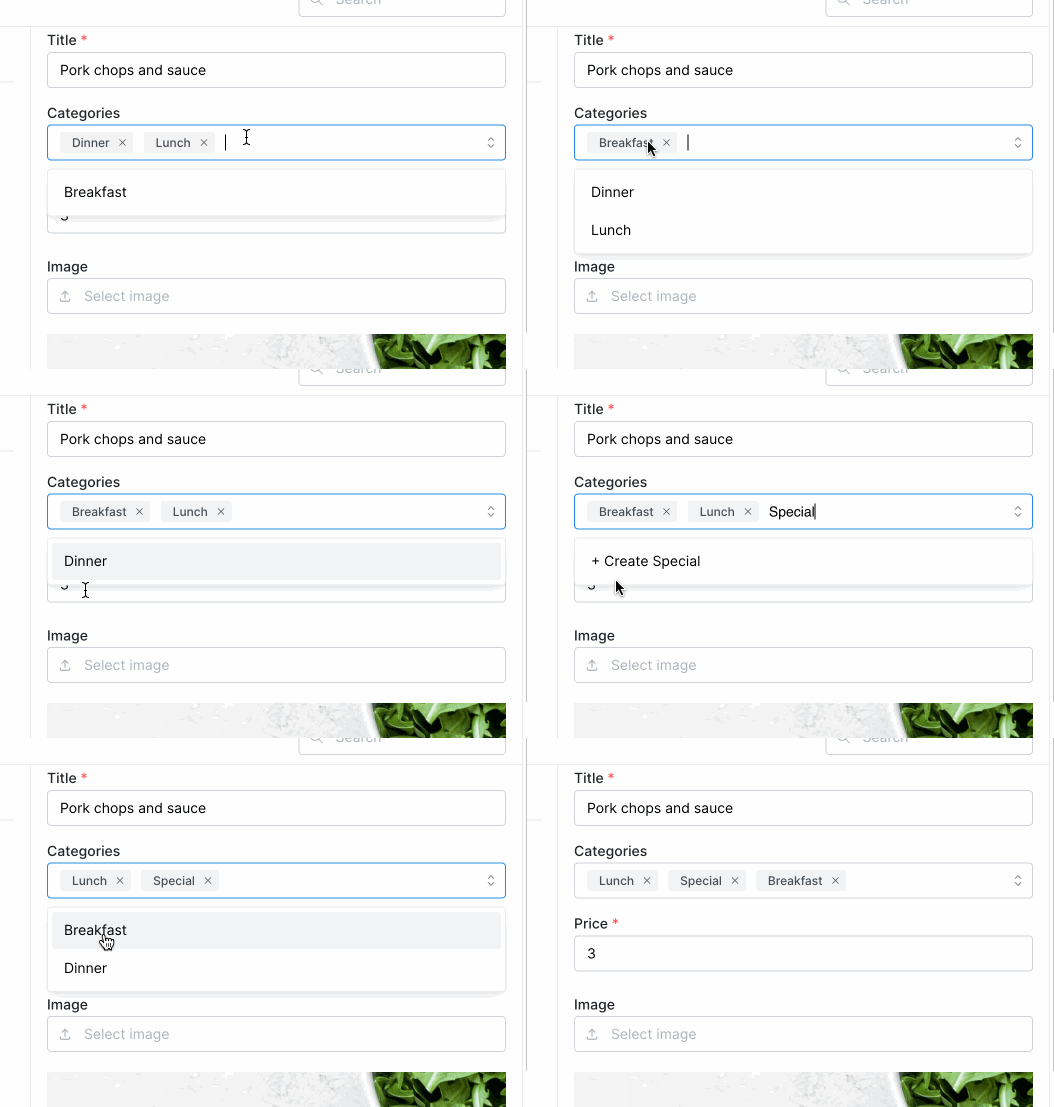
We’ve all seen this input before. A seemingly innocent input box and as soon as you focus and/or start typing – a list of suggestions appear. Not only that, you’re able to select multiple values, remove items from your selection – and even add a new one. This is typically used for fields such as “categories” or “tags” – where you can enter multiple values to a single record.
Disclaimer: This tutorial will not show how to make this component, instead we’ll go through how to hook it up to the backend. I’m also going to assume you know React and databases.
Ready to get started? Let’s go:

We’re using Mantine’s MultiSelect – which has a pretty consistent api – with other mutli selects out there. I also like Mantine’s accessibility, and its simplicity. We’re also using Prisma for our ORM – which makes it super easy to interact with our tables in the backend.
The Data / Tables
For this application, I have a main table called “Dish”. This is where we will connect our “Categories”. But for this work, we will need a “many to many” relation – so we will need a 3rd table – we’ll call it CategoriesOnDishes.
Below is the schema for tables.
model Dish {
  id          Int                   @id @default(autoincrement())
  title       String
  ...
  categories  CategoriesOnDishes[]
}

model Category {
  id          Int                  @id @default(autoincrement())
  name        String
  default     Boolean?
  dishes      CategoriesOnDishes[]
}

//THIS IS THE LOOKUP TABLE
model CategoriesOnDishes {
  dish       Dish     @relation(fields: [dishId], references: [id], onDelete: Cascade)
  dishId     Int
  category   Category @relation(fields: [categoryId], references: [id])
  categoryId Int
  @@id([dishId, categoryId])
}
Notice our “lookup table” is simply the connecting table for both main tables. This way we can assign multiple ids to each other.
The MultiSelect Component
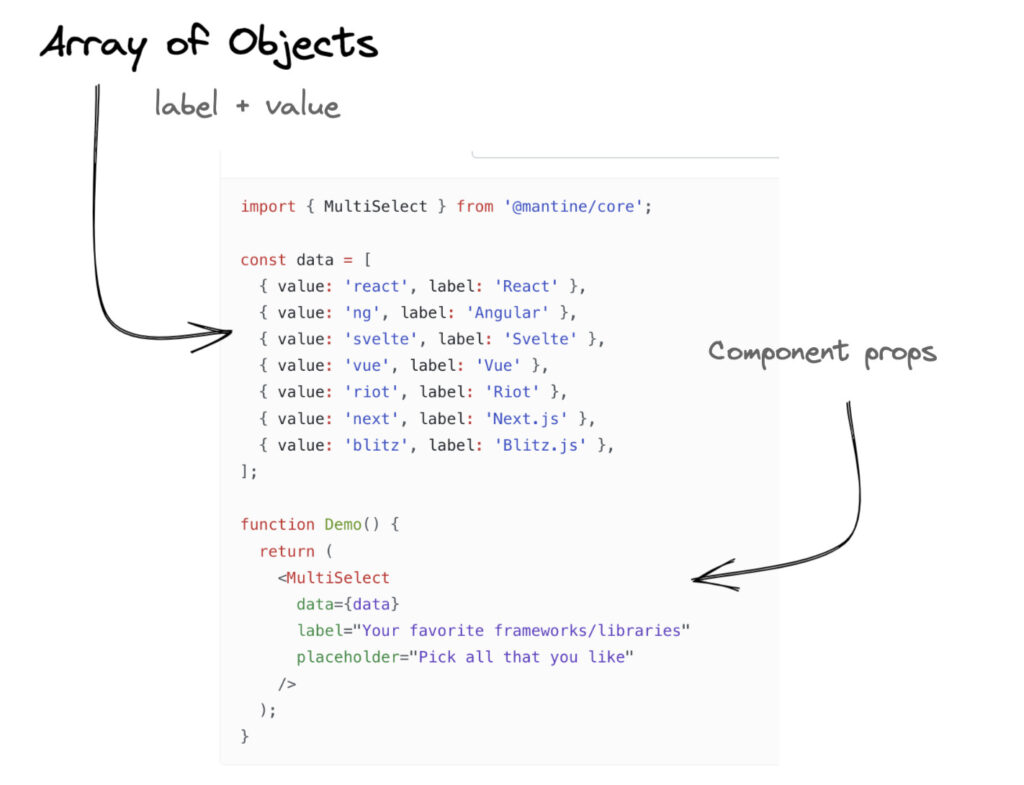
Looking at Mantine’s documentation, our component simply takes in an array of objects, with 2 properties: value and label:

We also have access which values the user selected – which is simply an array of strings. With this in mind, we can go ahead and build our app.
Get the categories
We’re using NextJS – so we can create API endpoints and interact with our database. We wouldn’t be able to achieve this with only client side code. With NextJS – we have the luxury of both, in one codebase – how nice is that.
In our endpoint, we simply check the method for “GET” and bring back the categories for selection in our component:
if(req.method === 'GET'){ //THIS IS FOR GETTING THE VALUES FOR THE SELECT

        let data  : Categories[] = [];
        data  = await prisma?.category.findMany() as Categories[];

            const uniqueValuesSet = new Set();

            //REMOVE DUPLICATE NAMES...
            data = data.filter((item)=>{
                const isPresentInSet = uniqueValuesSet.has(item.name);
                uniqueValuesSet.add(item.name);
                return !isPresentInSet;
            })
        }
        return res.status(200).json({ categories : data  })
    }
Notice that we have a remove duplicates section – this is optional. In my application, there could be duplicates due to the categories are based on each user / dish.
The Component
Now in the front end, we add the component to our form. You will notice a lot of this code doesn’t show the entire thing. I have greatly trimmed it down – only to highlight the important parts.
function CategorySelect( props:any) {
    const [ catOptions, setCatOptions ] = useState<any>();

    useEffect(()=>{
        (async()=>{
            const resp = await fetch('/api/lookups');
            let { categories } = await resp.json();

            let parsedCats = categories.map((cat:any)=>{
               return {
                    value : cat.name,
                    label : cat.name
                }
            })
            setCatOptions(parsedCats);
        })()
    },[])

  return (
        catOptions ?
        <MultiSelect
            mb="sm"
            label="Categories"
            data={catOptions}
            placeholder="Select or type categories"
            searchable
            creatable
            getCreateLabel={(query) => `+ Create ${query}`}
            onCreate={(query) => {
                const item = { value: query, label: query };
                setCatOptions((current:any) => [...current, item]);
                return item;
            }}
            />
         : null
  );
}
export default CategorySelect;
Above will set up our input to have data. As soon as you focus – you will see the list appear in the bottom. And as soon as you start typing – and what you typed is not in the list, a “Create XXX” appears in the bottom – all you have to do is select it.
How cool is that!
Inserting, Updating and Deleting Records
Now back to our API, we will add the logic that will allow us to insert, update and remove records. Remember, we only have an array of strings – so we are writing our logic based on that.
 try{
        const dataFromPost : string[]= req.body.data;
        const dishId = req.body.id;

        //FIRST FIND CATIDS FROM ARRAY OF STRINGS

        const foundData = await prisma?.category.findMany({
            where : {
               name : { in: dataFromPost }
            }
        }) as Categories[];

        const foundDataStr : string[] = [];
        let newEntry : string[] = [];
        let entryIds : number[] = [];

        foundData?.map((item)=>{
            entryIds.push(item.id);
            foundDataStr.push(item.name);
        })

        //PUT NEW CATEGORIES TO BE INSERTED IN A TEMP ARRAY FOR NOW...
        newEntry = dataFromPost.filter((item)=>!foundDataStr.includes(item))

        // CHECK IF CAT ID && DISHID EXIST IN LOOKUP...

        const existingLookup = await prisma?.categoriesOnDishes.findMany({
            where : {
            dishId : dishId,
            }
        })

        // ACTUAL CATS TO BE DELETED FROM LOOKUP
        let itemIdsToDelete : number[] = [];

        // REMOVING CATS TO PREVENT DUPLICATE INSERT TO LOOKUP
        let itemIdsToRemove : number[] = [];

        foundData?.forEach((item)=>{
            if(!dataFromPost.includes(item.name)){
            itemIdsToDelete.push(item.id)
            }
        })

        existingLookup?.forEach((item : any)=>{
            if(entryIds.includes(item[lookupItemIdKey])){
               itemIdsToRemove.push(item[lookupItemIdKey]);
            }else{
               itemIdsToDelete.push(item[lookupItemIdKey]);
            }
        })

        // REMOVE EXISTING LOOKUPS...
        entryIds = entryIds.filter((id)=>{
            return !itemIdsToRemove.includes(id);
        })
        type newEntryType = {
           name:string,
           userId:number,
           description?:string,
           default:boolean}

        // INSERT NEW CATEGORIES, ADD IDS TO CATIDS...
        if(newEntry.length > 0){
            let newEntryObj : newEntryType[] = [];
            newEntryObj = newEntry.map(item=>{
            let obj : newEntryType= {
                name:item,
                default : false
            }
                return obj
            })
            const itemsInserted = await prisma?.category.createMany({
                data: newEntryObj,
            })

            if(itemsInserted){
                const itemsInsertedResult = await prisma?.category.findMany({
                where : {
                userId : curUser.id,
                name : { in: newEntry },
                }
            })

            let itemsInsertedIds : number[] = [];
            itemsInsertedResult?.forEach((item : any)=>{
                itemsInsertedIds.push(item.id)
            })
            if(itemsInsertedIds){
                entryIds = entryIds.concat(itemsInsertedIds);
            }
            }
        } //end if catsinserted...


        //INSERT TO LOOKUP TABLE...
        const itemOnDishes = entryIds.map((item)=>{
            return {
            dishId : dishId,
            [lookupItemIdKey] : item
            }
        })

        //DOES NOT RETURN THE IDS!!!!
        await prisma?.categoryOnDishes.createMany({
            data: itemOnDishes,
        })

        //DELETE ITEMS FROM LOOKUP
        if(itemIdsToDelete.length > 0){
            await prisma?.categoryOnDishes.deleteMany({
               where: {
                 categoryId :{ in: itemIdsToDelete },
                 dishId : dishId
               },
            })
        }
        return res.status(200).json({ success: true})

}catch(err){
    return res.status(500).json({ error: JSON.stringify(err)})
}
A lot going on here. First we check if categories exist in our category table. If it does, let’s save the ids in a temp array. We are also saving the ones that are not in the table – these are the “new items” that we have to insert.
We’re also figuring out which ones are existing in the lookup table – which is not found in the submitted array of strings. These are the lookups we have to delete.
Finally, we are simply returning “success : true” for now. Ideally, you will return the ids of the records you’ve updated. But at the time of writing, one of Prisma’s methods – specifically createMany() doesn’t return the ids. For the sake of simplicity – we just return “true”.
Back to the Component
Okay, back to the front – let’s finish up our connect the dots. I’m only showing the necessary parts – that we need to add to our component. The comments below should show you how it works, and what its for.
//DONT FORGET THE STATE:
const [ selectedCats, setSelectedCats ] = useState([]);
const categoryChanged = (val:any) => {
        setSelectedCats(val);
    }
//THIS IS THE METHOD THAT CALLS OUR API...
const upsertMultiSelects = async (url:string, data:string[], id:number)=>{
        const options = {
            method: 'POST',
            ...getHeaders(null),
            body : JSON.stringify({data,id})
        }
        const resp = await fetch(url, options)
        const res = await resp.json();
    }

//ADD THIS TO THE FORM SUBMIT HANDLER:

upsertMultiSelects(`/api/lookups`,selectedCats,result.id);


//ADD THIS TO THE COMPONENT PROPS:
value={selectedCats}
onChange={categoryChanged}
With all that in place, you can wire it up to your form’s submit function. This approach is a separate method to calling the updating of the lookup and category table. But you can of course – bunch it all up along with the rest of the fields on your form – into a single REST call.
Final Result
Now if all of that works, you should be able to save your changes. Remember, the front end will work the same as before – its the saving to the database – is what we went through.

Go ahead and save your form – and hit refresh. If all goes well, your data will be preserved – and you can continue with your day.

