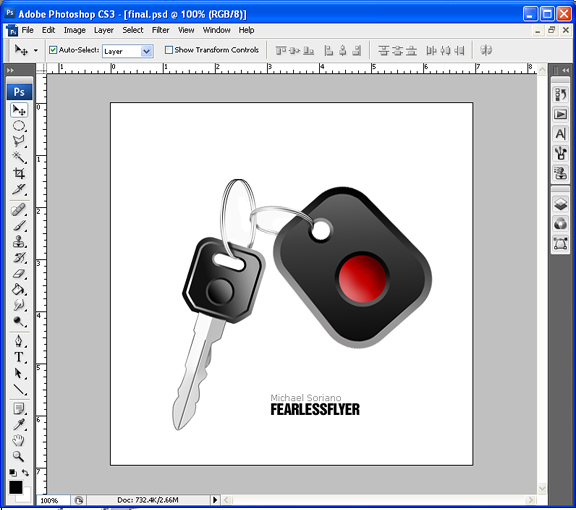
The following tutorial will show you how to create a nice key with a car alarm in Photoshop. This image is a combination of vector shapes as well as rastered images to achieve the effect. The tools we’ll be using in Photoshop are mainly the built in shape tool, filters and the pen tool. The final image is shown below:
Part 1: The Key
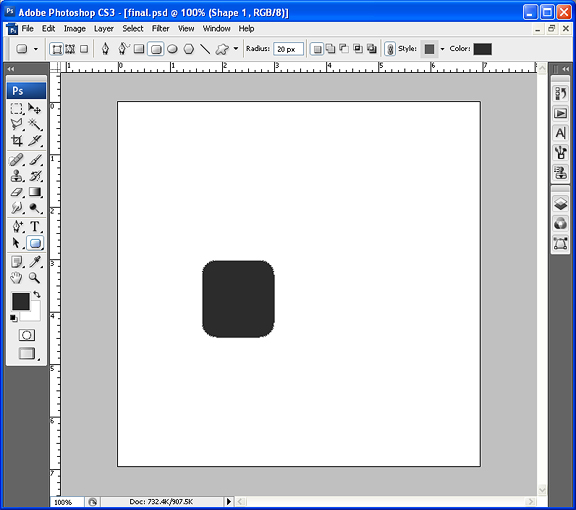
Using the Rounded Rectangle tool, Create a new shape of a square, with fill color #2c2c2c
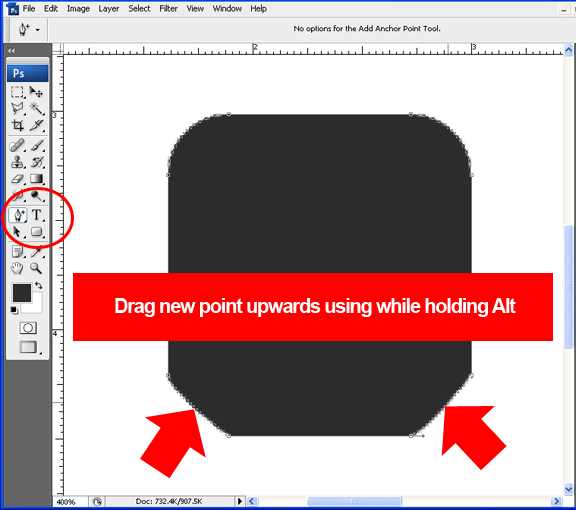
Using the Add Anchor Point, add new anchors at both lower corners of the shape. Drag these new anchor points upwards to form a nice edge.
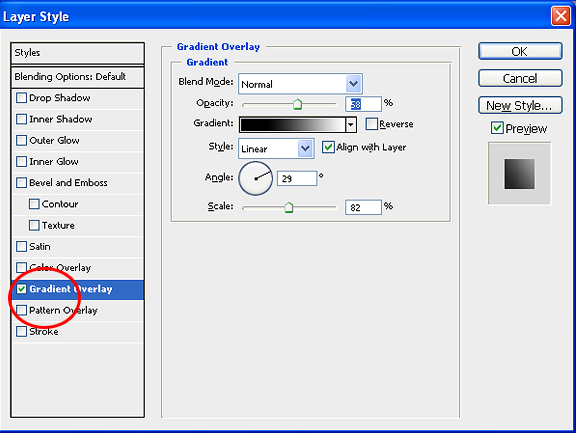
Apply a Gradient Overlay on the shape. Adjust the settings as shown below or you can choose your own gradiation.
Duplicate the layer you just created and Ctrl + T to transform. Transform it to about 90% less than the original size. Make sure you constrain the proportions.
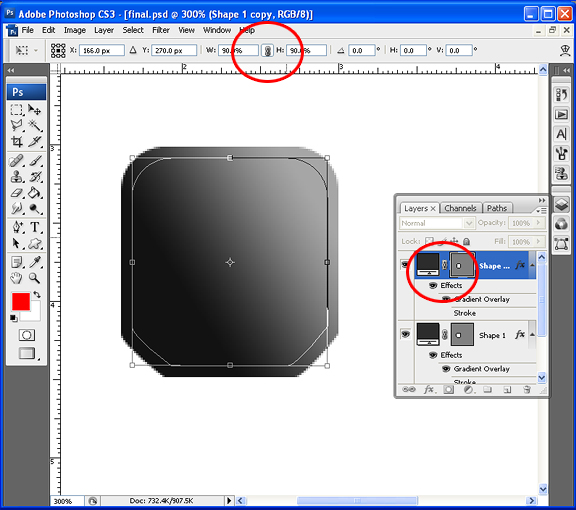
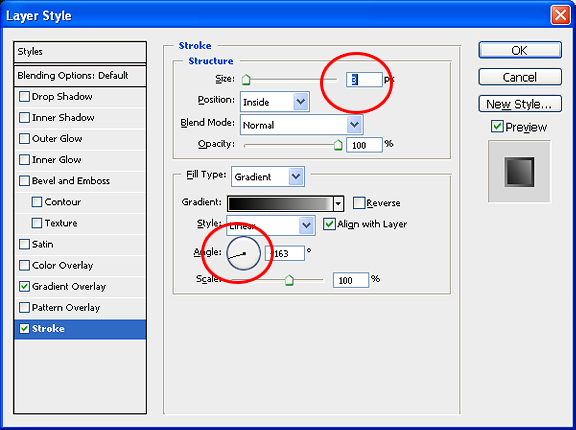
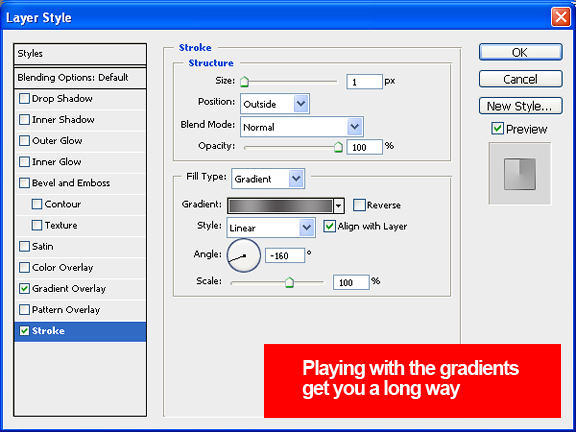
Apply a new layer style – Stroke, with fill type as gradient, size of 3 and the rest of the settings like shown below:
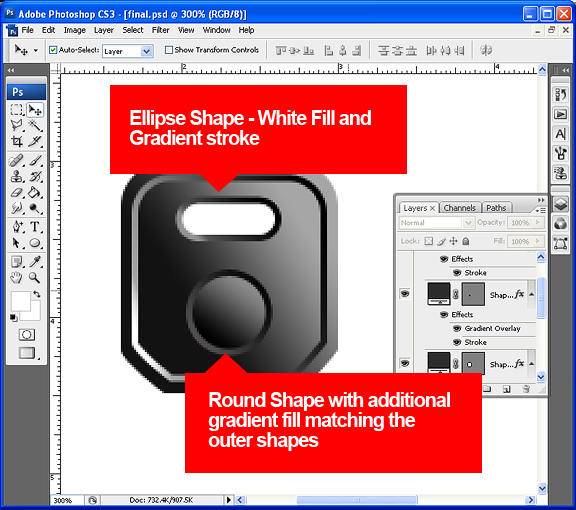
Using the rounded rectangle tool and the ellipse tool, create two more shapes. The rounded rectangle will have a fill color of #ffffff, the ellipse with fill color #2c2c2c. Apply the same layer styles to both – stroke with gradient fill. Play around with the gradients and try to match the outer shapes:
Next is the shaft of the key. With the Pen Tool, start outlining the jagged edges of the key shaft. You can use a real key as a guide. I used two shapes for the shaft – one for the main, the other for the underlying teeth behind the main shaft. I also used the line tool to draw a line on top of the main shaft.
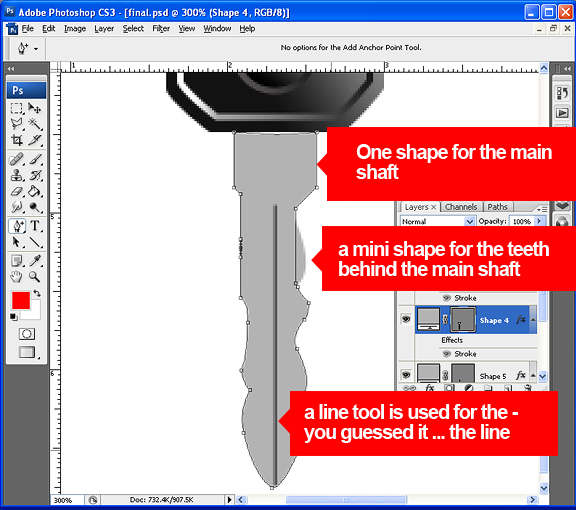
Again, apply some layer styles to the two main shapes. First is a stroke with gradient fill type – reduce the size of the stroke line to 1 and adjust the gradient colors. Do the same thing for the teeth.
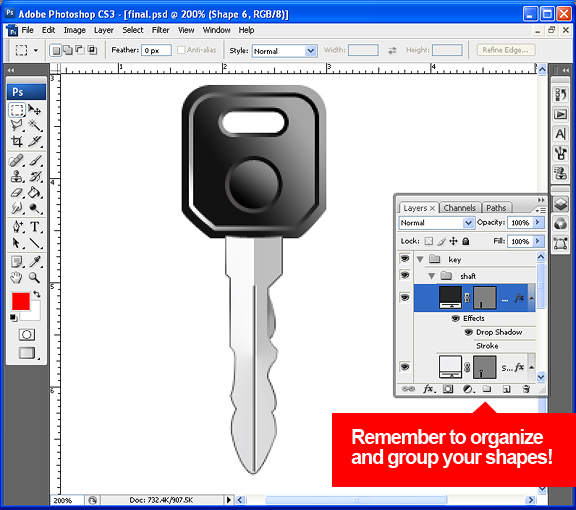
The final result should be something like below. We now move on to the car alarm part.
Part 2: The Car Alarm
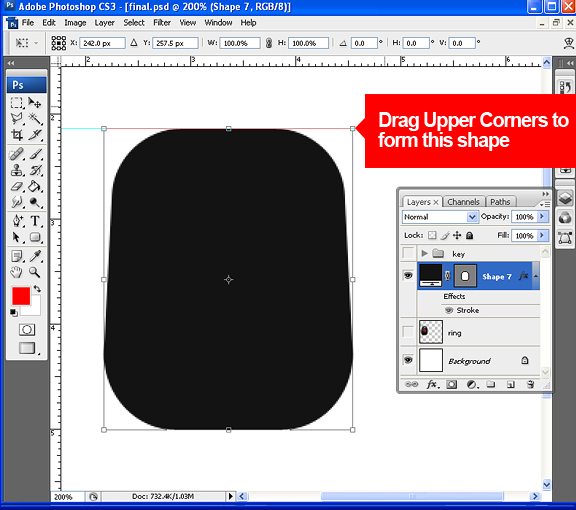
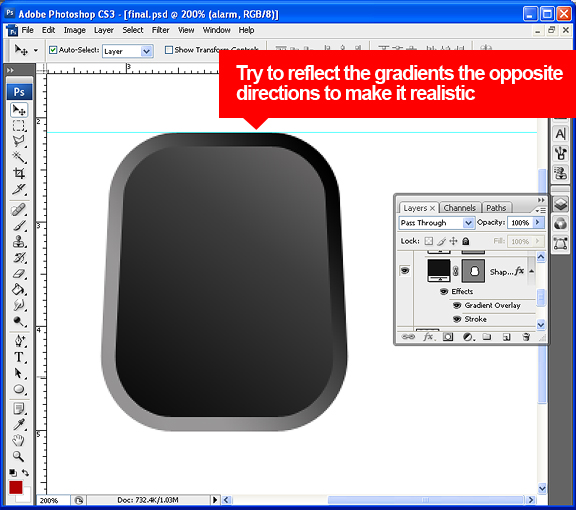
Hide all the layers you’ve done so far so you won’t get distracted. Starting again with the rounded rectangle tool, create a new shape – slightly bigger than our key head before. Make the radius to 50 pixels for a more rounded look. Go to “Edit” > “Transform” > “Perspective” and drag the upper handles closer to each other.
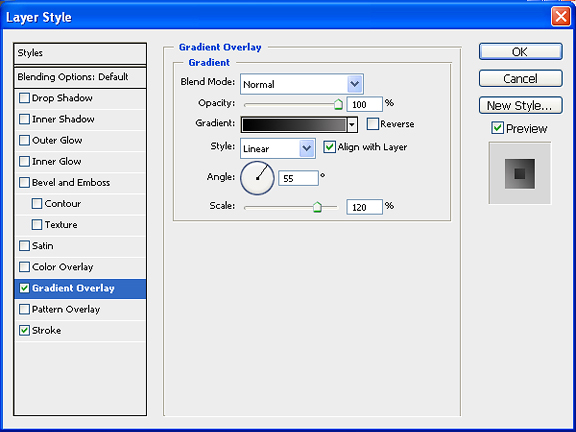
Again, apply layer styles to the new shape: An angled gradient overlay with the setting below, as well as a thick stroke with gradient fill type – again play with the shades.
The first shape should look like something like below. Note that when playing with gradient fills – there’s no exact way to do it. You just have to follow what looks right with your eye considering the light, shadows etc.
Next is to add two more shapes using the ellipse tool. One is for the keyhole which is smaller, the other for the button. Both will have stroke styles with gradient fill types. By now you should know how to play with this effect. Remember that the keyhole is to have a fill of white – or whatever background color you have, and the button is a darker red, also filled with a gradient:
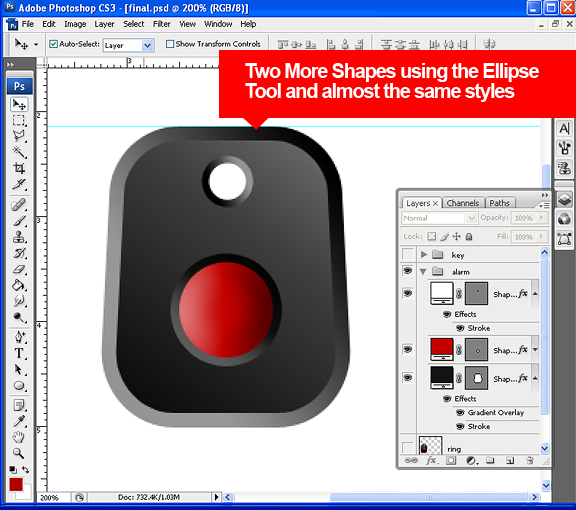
And we’re done with the car alarm part. Next part is pretty easy – the key rings.
Part 3: The Rings
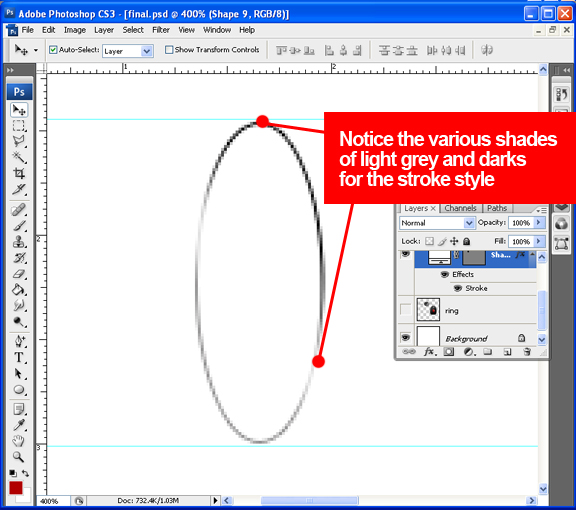
Start with the ellipse tool, create an oval shape (size it according to the key and the alarm). Apply layer style stroke of 1 pixel, with type gradient fill. Adjust the gradient accordingly varying colors from light grey to dark.
Duplicate the first ring twice. The duplicate rings should have a Fill (not Opacity) of 60 percent each. Adjust the angle of the gradients of each layer stroke to go in different directions. Again, its up to your judgment what looks best. You’re trying to achieve the illusion of aluminum texture with the shines.
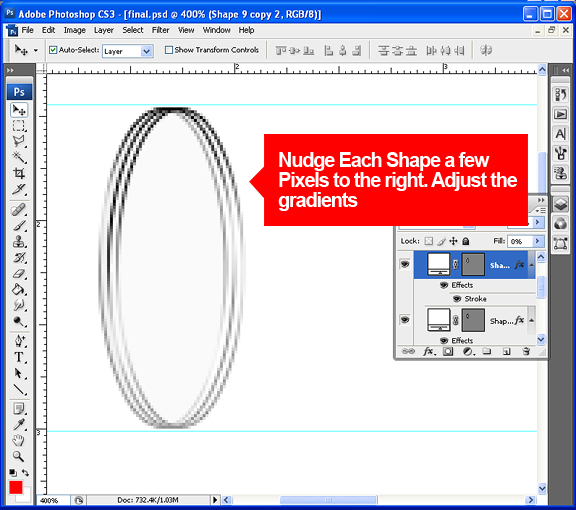
From these three shapes – you want to duplicate them into another group. Click Ctrl – T to transform about 80 percent smaller than the first group.
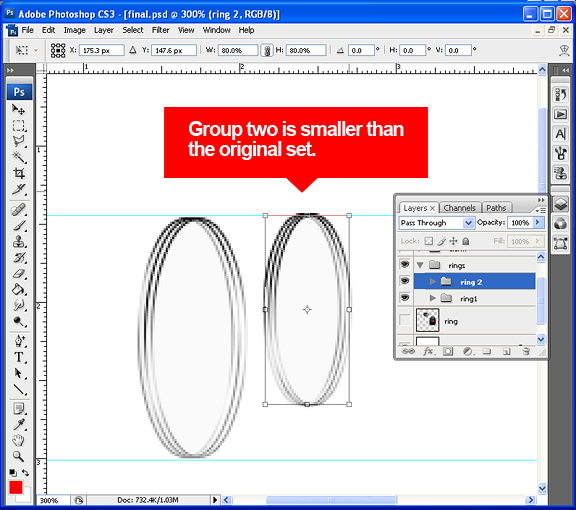
And that is the final step for the rings. Next section is combining all the elements together.
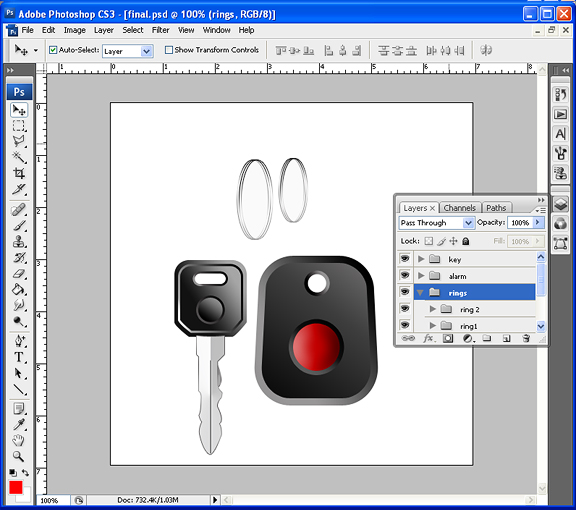
Part 4: Combining Them Together
The easiest way to work with what we have so far is to rasterize the shapes into more manageable sections. Rasterizing means to flatten the shape for a different kind of editing. It is good practice to always keep your layers grouped and organized – in my case, I’ve grouped them into three sections: key, alarm and rings. To rasterize – I select one group, duplicate it and from that group I merge layers. Once its merged – the key group is going to be just a key layer, the alarm group – an alarm layer and so forth. DO NOT rasterize the original group! Its good practice to keep the vector shapes intact just in case you want to change something.
So after merging each of the groups – we should now have four layers: key, alarm and the two rings.
First rotate the key a few degrees clockwise. Put the bigger ring on top of the key layer. Using the ellipse marquee tool, select the inner section of the rings and start erasing the area where the key is supposed to be visible.
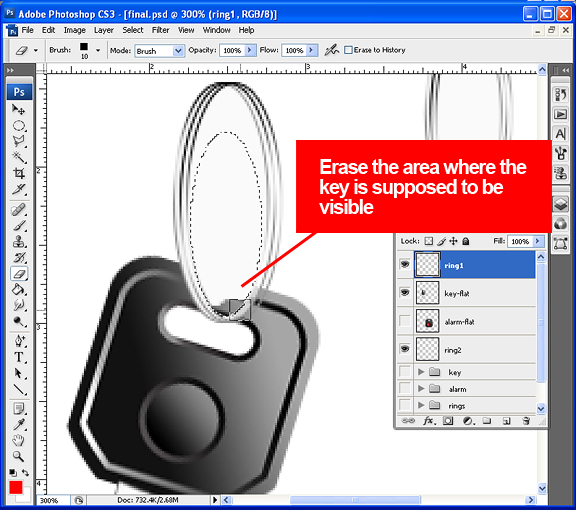
Do the same thing for the ring layer. You can use any selection tool that you’re comfortable with using: Lasso, Magic Wand – I use the pen tool because it’s more precise and have more control.
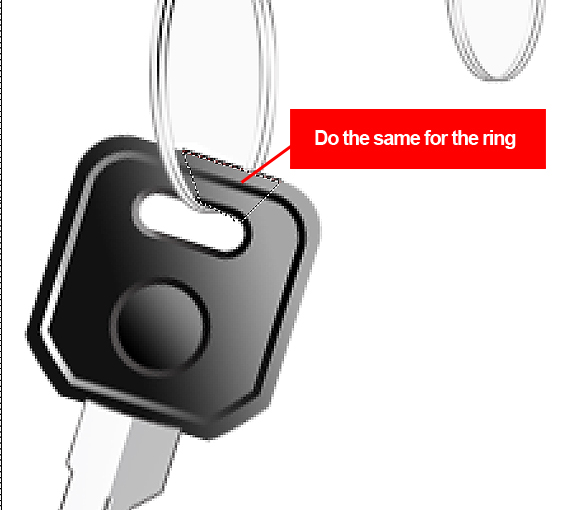
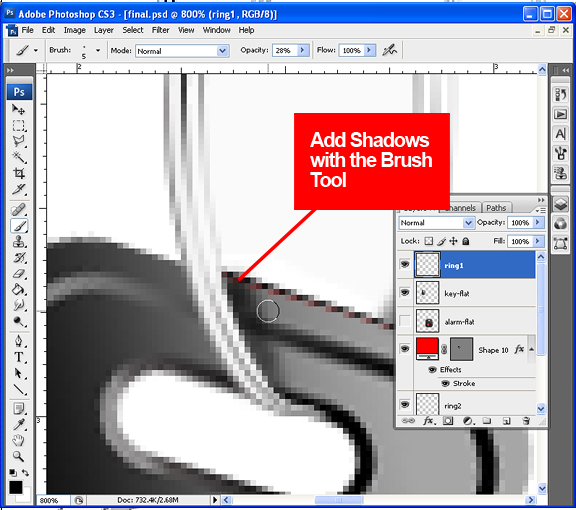
Finally, add some shadows in the places there should be shadows. I do not know of an efficient way to do this but to use the brush tool. Using the built in Photoshop shadow or glow effects apply it in the entire layer – leaving you with having to separate the layer, then erasing – this may be suitable for larger surface areas – but for our purpose, just dab a few brush spots – play with the brush types, opacity and strength, and you should have a pretty decent effect:
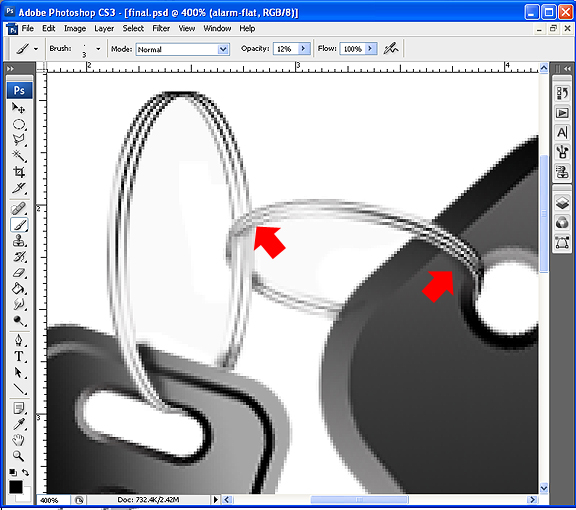
Do the same to the rest of the layers. You will be using a combination of rotating, erasing and painting to achieve the interlocking illusion as in a real set of keys. It is important to pay attention where the light, the shines and the shadows are supposed to be. Also, keep in mind – you may rotate your layers, but DO NOT – I repeat DO NOT resize them. Resizing rasterized layers result in extreme loss of quality. If ever you need to resize say the key image – you will have to go back to your vector layers for that. The interlocking rings, key and alarm should look something like this:
And there you have it. You’ve just created a key with car alarm entirely in Photoshop. You may download the psd file from this link.


whanna a good tutorial michael, michael please make another wp theme again
extra nice. you got style
thanks