I’ve been using a lot of FluentUI lately. This is mainly because my work has chosen the Microsoft stack for our intranet portal. FluentUI keeps the look of our apps consistent across the board – so users won’t be able to tell custom code and off the shelf.
FluentUI uses React under the hood, so the tutorial below is meant for React developers. A preview of how the search works is shown below.
Ready to code? Let’s begin.
Getting the items
So assuming you’re getting you list of items via fetch, you’re most likely going to have an “init”. In React, this is done using the useEffect hook – with an empty dependency array. We’re also setting a couple of getters and setters using state:
const [ links, setLinks ] = React.useState<LinkType[]>([]);
const [ allLinks, setAllLinks ]= React.useState<LinkType[]>([]);

useEffect(()=>{
   (async()=>{
       const items  = await fetch(...);
       setLinks(items);
       setAllLinks(items);
     })()
 },[])
You’re probably wondering why we have two states “links” and “allLinks”. This is to store the “unfiltered” set of items (allLinks) on which we do a search on – while the results will be in “links”.
So this will load our items in our display when we first load our UI.
The Text input
Now let’s add a text input. You will realize that the HTML are all different – because they’re not regular HTML at all. Instead, they’re a bunch of wrappers designed by FluentUI in which we simply just have to learn what we can pass into it.
In our case, we’re passing an icon (a magnifying glass), a placeholder, some styles and an onChange event to the “TextField” component:
<TextField
   iconProps={{ iconName: 'Search' }}
   placeholder="Search for a link..."
   onChange={doSearch} styles={getStyles}  />
I want to first focus on the getStyles function below. Notice that it just returns an object that contains CSS props as an array – for the nodes you want to target. Think of it as in regular HTML, when you design an input – you’d have to add a “label”, “fieldGroup”, “input” etc.
function getStyles(props: ITextFieldStyleProps): Partial<ITextFieldStyles> {
         return {
          fieldGroup: [
            {
                marginTop : '15px',
                marginLeft : '8px',
                borderColor : '#c0c0c0',
                maxWidth: '224px',
            }
          ],
          subComponentStyles: {
             label: { ...labelstyles },
           },
        };
      }
You’ll be seeing a lot of this type of API throughout.
Let’s also add another state for the searchTerm:
const [ searchTerm, setSearchTerm ] = React.useState<string>('');Add a function “doSearch” so we can tie it with our TextField’s onChange event. Every time we change it, it should update our state:
const doSearch = (e, val) : void => {
   setSearchTerm(val);
}
Now let’s create another effect, that will filter our items:
useEffect(()=>{
        if(searchTerm === ''){
            setItems(allLinks);
        }else{
            const filtered = allLinks.filter(link => {
                const title = link.Title.toLowerCase();
                return title.indexOf(searchTerm) !== -1;
              }).map(link => {
                return {
                  ...link,
                  Highlighted : highlightTerm(searchTerm, link.Title)
              }})
            setItems(filtered);
        }
 },[searchTerm])
One quick note is the dependency array – we have “searchTerm“. So this triggers every time our state changes. So if there is no term – we reset the items to “alltems”, otherwise – we do a “filter” on our items array.
The search algorithm is just a basic string match – which can be greatly improved. But that’s not the focus of this tutorial.
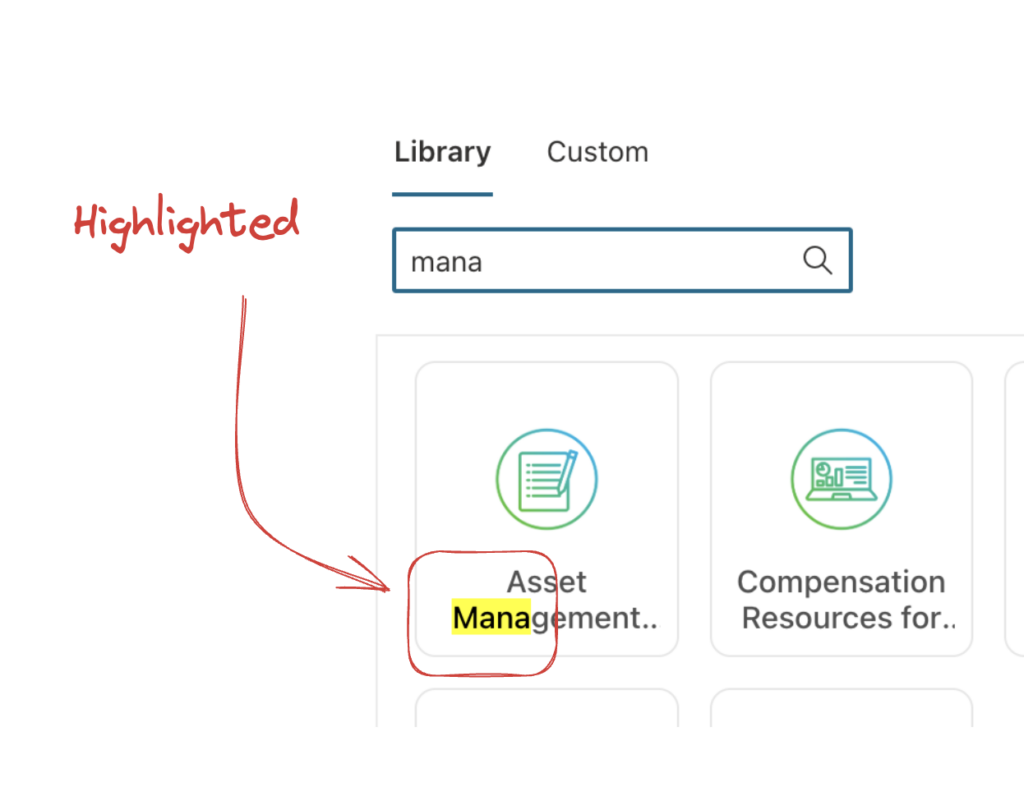
You’ll also notice a .map – where we add a “Highlighted” property. That comes next.
Highlighting the term
It’s always a nice touch to highlight the search term in the results. This is a little helper that is called to wrap the term in a “mark” tag – so we can style it.
export function highlightTerm(term : string, src : string) : string {
    if(term && src){
      term = term.replace(/(\s+)/,"(<[^>]+>)*$1(<[^>]+>)*");
      const pattern = new RegExp(`(${term})`, "gi");
      src = src.replace(pattern, "<mark>$1</mark>");
      src = src.replace(/(<mark>[^<>]*)((<[^>]+>)+)([^<>]*<\/mark>)/,"$1</mark>$2<mark>$4");
      return src;
    }
    return src;
}
Now that all our elements are in place, its time for the display.
Displaying the results
This section should be really familiar – its just a map that returns some JSX:
{links.map(link => {
      return (
         <div dangerouslySetInnerHTML={{__html:item.Highlighted}}/>
      )
 })}
Notice the use of dangerouslySetInnerHTML – that’s because we want our “mark” which is HTML to show.
This is as simple as it gets. As mentioned before – the actual search mechanism can be better. I also would like to see some “loading” mechanism – for instances that the data takes long to fetch. And of course – some error handling would be good.
Leave your thoughts below.